Anti-aliasing
This is a fairly complicated subject that deserves its own page. This mainly concerns 3D systems, but some of the earlier stuff can also apply to 2D in the form of “shaders”. If you'd like a more in-depth look into this, this blogpost does a pretty good job of explaining the concept using non-technical English and great illustrations. Just be warned it's a huge page (for web at least) at 72MB so mobile viewing is not recommended.
This page will go over the basics and how it applies to Batocera's settings. Click on an image to see its full resolution, as some devices may downscale them for previews, ruining the anti-aliasing.
What is anti-aliasing?
In essence, a way to mitigate aliasing caused by computer generated graphics, typically apparent when showing a lower resolution image on a large display. You may be familiar with this being called “jaggies” or “the staircase effect”, where the square edges of pixels become very obvious. In the image below, the top is the original image as it appears at its native resolution, the left is that image simply enlarged (notice the staircasing effect on the diagonals) while the right one has been 'anti-aliased' by an upscaler.

Image illustrated by Wikimedia user LucasVB. Licensed under Creative Commons.
That looks garbage, why would I want this?
Anti-aliasing is not strictly necessary, and in most cases with 2D games it can actually work as a detriment, but there are reasons it can be desirable:
- Artists depending on the softness of analog signals to achieve a particular effect (eg. SGI rendered games like Donkey Kong Country, Super Mario RPG, etc.)
- 3D geometry not looking as “blocky”
- Textures not directly facing the camera appearing aliased
- The resolution of the display is not an integer multiple of the source (if you're using any 'standard definition' consoles which display at 480p on a true HD display at 1080p, 480 is not a factor of 1080 and thus can cause 'uneven' pixels)
So for most 2D systems on a sufficiently high enough resolution display, using no anti-aliasing at all provides an accurate enough image anyway. Batocera ships with the “smooth games” option enabled which at least avoids “uneven” pixels, at the cost of increased blur. But if you're interested in enhancing 3D systems or are after that “authentic experience”, read on.
Filtering vs. upscaling

This page is what you're after. Basically for 2D, filtering = how it looked on original hardware and upscaling = enhancement of original content.
Filters
Shaders are used to apply certain post-processing filters to the final output image; these shaders don't actually interact with the game itself to produce these results. Essentially, these shaders can be applied to any image. For 2D systems this can work really well in conveying the same sort of feeling of playing the game on a CRT television typical of the time period it was released. However, for 3D systems, these sorts of shaders can work as a detriment if all you're aiming to achieve is clarity over authenticity. When playing around with the 3D anti-aliasing techniques described later in this page, you should try them out without any shaders being applied on top of them, as they can mask their benefits (and sometimes even fight against it).
Upscaling
Upscalers are a special type of shader that 'predicts' what the image would have been like if it was a higher resolution, using the power of mathematics! Use of upscalers for 2D games is quite subjective, Batocera includes the rather sophisticated xBR upscaler in a shader set called Enhanced. Use of this type of shader is not recommended for 3D systems at all, there are forms of anti-aliasing specific to 3D geometry further down this page. If you're interested in applying upscaling to the textures drawn on 3D objects in the game, refer to texture enhancement.
![]()
A comparison of common upscaling techniques. Author: Drummyfish. Licensed under Creative Commons.
Mip-mapping
Starting out as an optimization, mip-mapping dynamically swaps out textures for far away objects with lower resolution textures. This helps save resources (graphics RAM) without much visual degradation and gets rid of the Moire pattern, however it can make surfaces at oblique angles appear “blurry”. Click into the following image and view it at its original resolution to see the effect.

The Moire effect is visible on the further tiles without mip-mapping, whethers with mip-mapping they appear blurry instead. Taken from Rick’s blog http://tower22.blogspot.com/2011_10_01_archive
Some 3D consoles however, such as the N64, instead used this for alternative purposes such as texture transitions (the Peach painting in Super Mario 64) or texture animation. This usually came at a significant performance cost due to not actually replacing textures with lower memory ones but instead just switching it with an identically sized one (cutting the usable texture memory in half), so most games opted not to utilize it.
In typical computer applications and consoles after the 5th generation, you can have either bilinear mip-mapping or trilinear mip-mapping. Trilinear mip-mapping generates a smoother transition between the lower and higher resolution textures, but comes at increased CPU cost compared to standard bilinear mip-mapping.
In most cases, you'll want to have mip-mapping enabled, as it can both improve the quality of the final rendered image and reduce CPU/GPU cost. Only the original PlayStation had no capability of mip-mapping, as it was using bargain-bin hardware to reduce costs.
Anisotropic filtering
Unfortunately, use of mip-mapping can make textures at oblique angles appear blurry. So, instead of just using textures that have lower resolutions for all dimensions, why not just reduce the resolution for the most immediately apparent dimension? Explanation of the particulars of this are outside the scope of this article, so here's a picture comparison (just mip-mapping on the left, mip-mapping + anisotropic filtering on the right):

The repeating tiles in the background appear much sharper with anisotropic filtering enabled. Author: THOMAS, derivative of Lampak's work. Licensed under Creative Commons.
And the best part is that this is pretty CPU/GPU inexpensive, as it's just leveraging the already existing mip-mapping functionality. If you're in a situation where you can activate anisotropic filtering, there is a high chance you can go all the way up to x16 without penalty. If you're on really weak hardware like an SBC, you can get away with just doing say x4 anisotropic filtering and still get most of its benefits.
Multi-Sample Anti-Aliasing
One of the more readily available forms of polygonal anti-aliasing, typically abbreviated as “MSAA”. Not to be confused with MFAA, which is another beast altogether. MSAA will render 3D objects at a higher resolution and then downsample it on the screen to create a smoother and more natural output. It's most noticeable at the edges of 3D objects. The benefits of MSAA become less pronounced as the resolution of the output image is increased. For instance, a 4K display would have nearly no noticeable visual difference with MSAA turned on or off (but the framerate would be halved from having to render all those extra pixels!).

The edges of geometry appears much more natural with MSAA enabled. Cropped from Nvidia's comparison page (link no longer available).
For enhancing the appearence of 3D objects, MSAA is on the cheaper side as it only tries to do it for the edges of objects, but in practice can still cut your framerate in half even at x2. Use this only if you know your system has plenty of overhead to spare. Due to the way it's implemented, MSAA may introduce visual artifacts (visible seams on textures with transparency, layer ordering disabling MSAA on certain objects but not others, etc.) that would otherwise not be present. Alternatively you could use a shader to blur the output of the entire image, negating the benefit/need of MSAA. If you have plenty of overhead, then you could use SSAA instead (explained in the next section).
Super-Sample Anti-Aliasing
Also sometimes referred to as “render upscaling” or abbreviated as “SSAA”. SSAA render the entire scene at a higher resolution, and then downsample it to your screen's resolution. This produces the most accurate, smooth representation of *all* objects on the screen, 2D and 3D, thus not sharing some of the visual artifacts that can occur with MSAA. In the following image, the native output is on the left and SSAA has been enabled on the right.

SSAA can make even Minecraft-esque blocks appear more natural! Author: Gsliepen. Licensed under Creative Commons.
Comes at a severe performance cost; SSAA can only realistically be utilized by x86 based computer running powerful graphics cards. Since its end results are very similar to MSAA, you may want to use that instead.
Texture Enhancement
This is the act of applying the 2D upscalers to the textures on 3D objects. In general, it can make certain textures appear seemingly clearer, but can be an inaccurate representation of the texture artist's original vision (and in a worse case, could interfer with UV values! Those such techniques weren't typically used 5th gen and below). These enhancements are typically only available for certain 5th gen console emulators.
- No enhancement

- Jinc2 enhancement

- xBR enhancement

Texture Replacement
Also known as “texture packs”, this takes texture enhancement to its logical extreme. What if the textures are just completely redrawn by hand?
Obviously this is not an automated solution so it depends on someone having done the work itself, but it results in objectively the highest texture quality output feasible on the emulator of all the other techniques.
It can also offer the opportunity to restyle the game in an entirely different art style.
Since such features are dependent on the emulator supporting them, they are usually only noted in their respective wiki pages.
How does all this apply to Batocera?
It's a fairly complicated subject, so I'll make ludicrous use of comparison images here for illustration. Keep in mind that you don't need to actually go and configure all of this yourself, Batocera's default “Auto” setting will do a perfectly fine job.
Shaders
Shader sets are pre-configured shaders that can imitate the look of a classic CRT television, giving a more authentic look for older systems as they would have typically appeared on televisions used at the time. Refer to shader sets for more comparisons and how to make shader sets yourself. Click on the following images for the proper effect!


For 3D systems 5th gen and above (PSX, N64, etc.) shaders aren't as beneficial, though some may still prefer them to retain the true authentic experience. 2D games, although uncommon on these systems, still reap the same benefits as they did from 4th gen and before. If you'd like to see a bunch of example comparisons, this Twitter account is worth a visit.
3D Enhancements
Due to the nature of 3D polygons and general graphical improvements over the years, some of the 3D systems emulated in Batocera offer enhancements over how the original console would have rendered them. These options aren't always available for all systems and all emulators.
N64 3D Enhancement
N64 emulators seem to have some weird limitations, here are comparison shots of the mupen64plus/glide64mk2 emulator at various settings:
| EmulationStation settings | Actual Mupen64 settings | Preview (click to enlarge) |
|---|---|---|
| Mip-mapping = trilinear, anisotropic = off. | Nearest-point texture filtering, no mip-mapping, no anisotropic filtering. |  |
| Mip-mapping = nearest, anisotropic = off. | Bilinear texture filtering, no mip-mapping, no anisotropic filtering. | 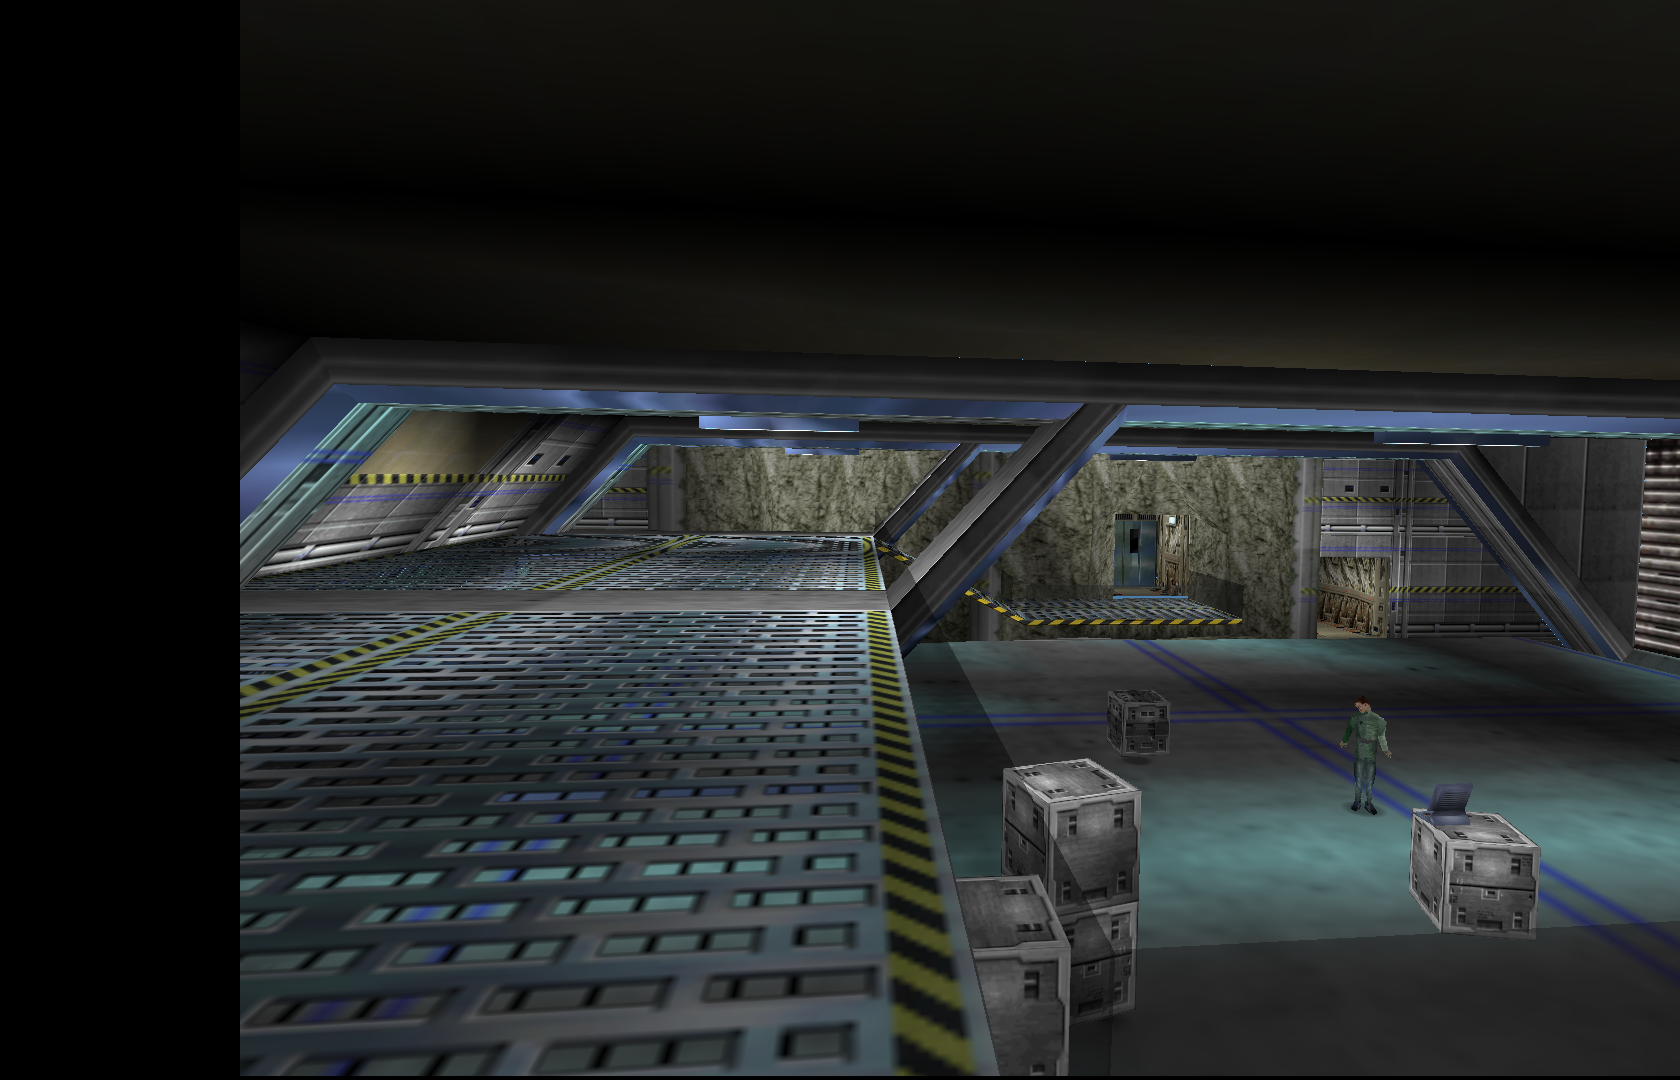 |
| Mip-mapping = bilinear, anisotropic = 2x. | Bilinear texture filtering, trilinear mip-mapping, 2x anisotropic filtering. |  |
| Mip-mapping = bilinear, anisotropic = 16x. | Bilinear texture filtering, trilinear mip-mapping, 2x anisotropic filtering. |  |
Yes, the settings in EmulationStation don't make sense at all. Mupen64 will tell you the currently selected settings upon starting the emulator in the bottom left corner, use this as your reference. If a setting isn't mentioned, it's assumed to be on 'automatic'. Experiment with them to achieve your desired results! In any case, though, leaving everything on Auto in EmulationStation should suffice.
Overall the N64 had some pretty weird implementation of mip-mapping atypical to how it was used with computer programs back in the day. This post and this later post by GlideN64's author goes a bit detail about emulation of it, but even that barely scratches the surface.
Angrylion's Parallel RDP (libretro/parallel_n64) is a more accurate emulation of the N64's graphics but it's much more platform dependent and so may not be available for all builds. It also lacks many graphical enhancements outside of simply increasing the rendering resolution (faux SSAA).
N64 Deblur
The N64 actually had a blur filter built into the system, which was used to mask the rough edges of polygons and 2D textures. The community has created gameshark cheats that can be used to disable the blur filter on real hardware, more about that can be read here.


Taken from RetroRGB's blogpost.
This filter is typically not emulated. You can simulate an approximation of the filter by leaving the “Smooth games” option turned on, but a better one would be using a weak gaussian blur such as one provided by RetroArch shaders.
PSX 3D Enhancement
The original PlayStation had no form of anti-aliasing whatsoever, 2D or 3D. Geometry and textures were always rendered to their nearest point. This was slightly masked by the blurry video output of the PSX. Thus, all forms of anti-aliasing can be considered an enhancement.
| 3D Enhancement | Preview (click to enlarge) | Notes |
|---|---|---|
| Native rendering resolution | 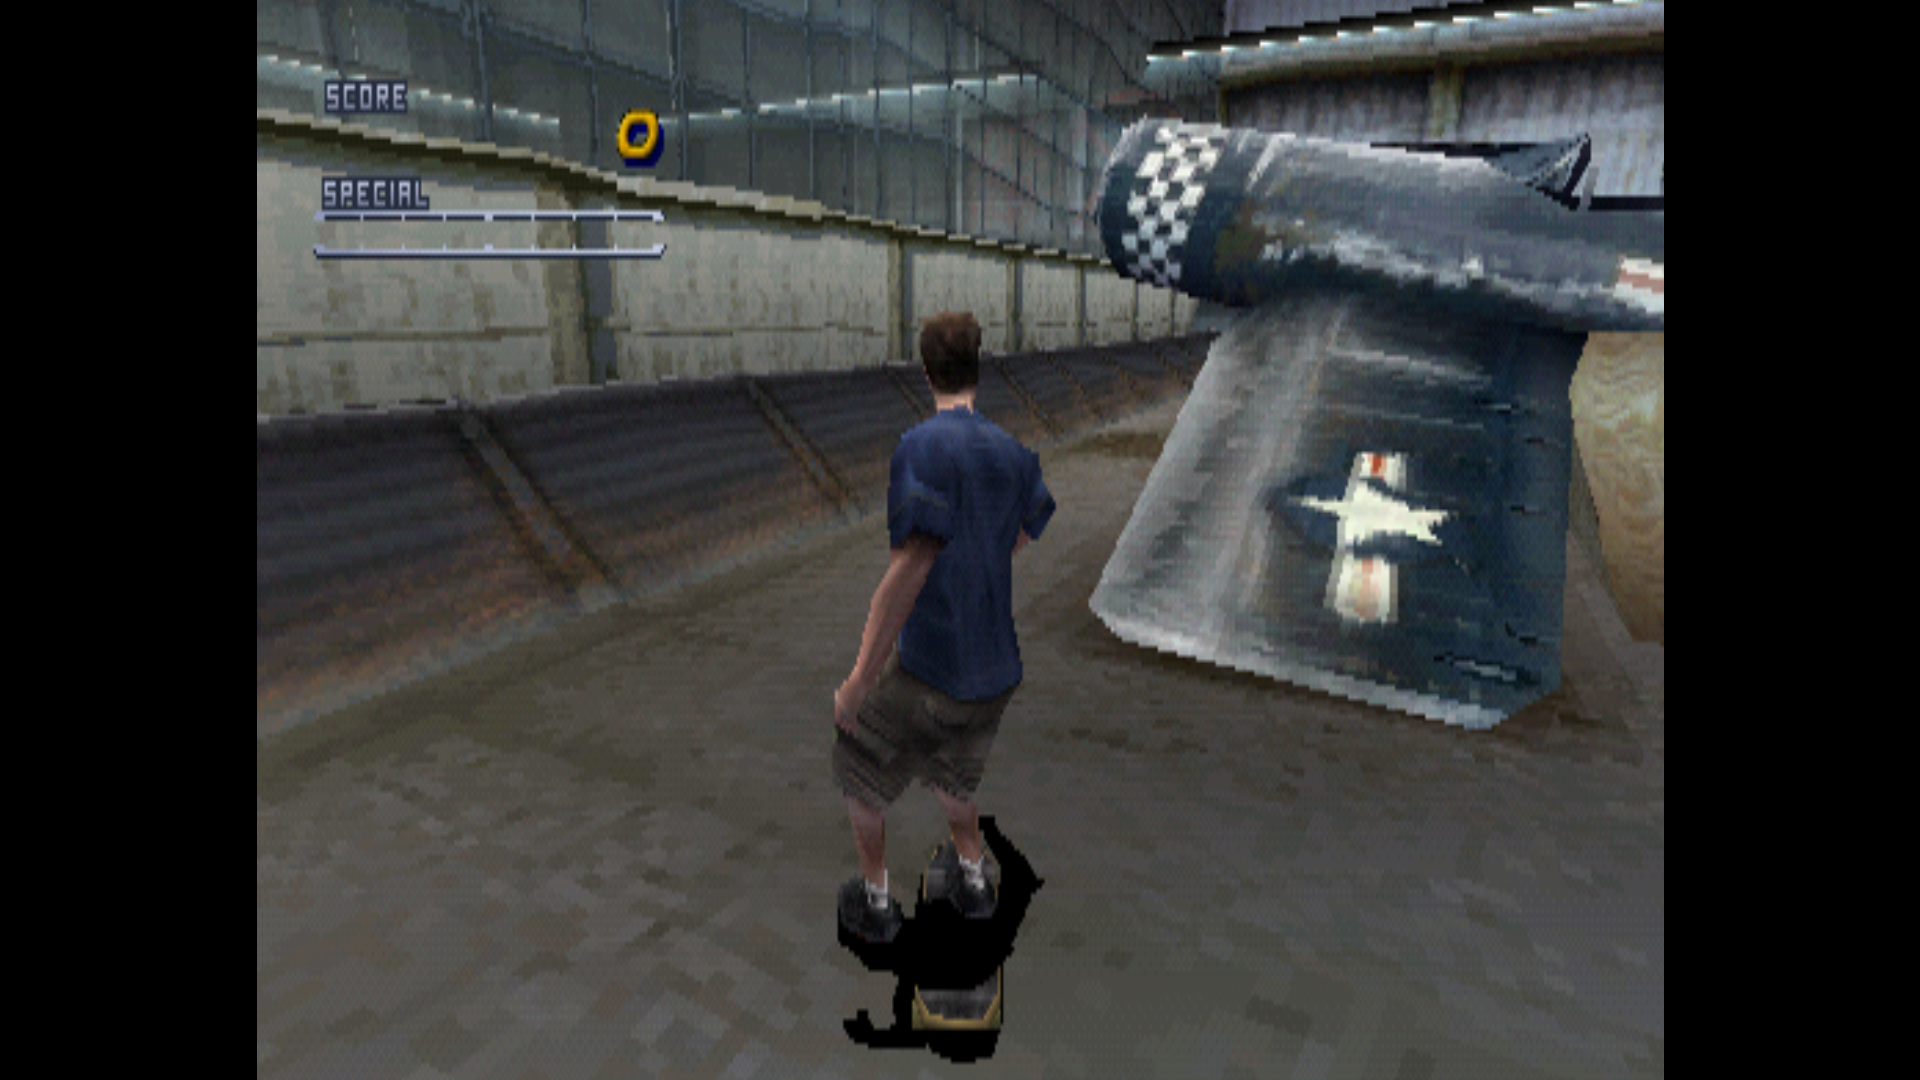 | Take note of all the “jaggies”. This is how it would have appeared on the original hardware, if the PSX could produce a crystal clear video signal. |
| Native resolution + 8x MSAA |  | Note how only some edges of objects, such as the plane wing and the overhead light, have been smoothened. The warehouse divider that's flush with the glass still has jagged edges. |
| Native resolution + 8x SSAA |  | Now all objects and textures have been properly smoothed out. Keep in mind this is still at native rendering resolution output (~288p), at higher rendering resolutions the effect isn't as blurry. |
| Increased rendering resolution |  | The most neutral enhancement. Notice how the low resolution textures have become more apparent. |
| Increased resolution + JINC2 texture enhancement |  | Makes it look like a N64 game! Blasphemy! Note how it doesn't handle transparent textures like the plane's shadow too well. |
| Increased resolution + xBR texture enhancement |  | Makes the ground look like a watercolor painting. This enhancement works better for simplistic art styles. |
Precision Geometry Transform Pipeline
The PlayStation is renown for its… unique way of inaccurately rendering 3D geometry, especially when close to the camera. This is actually due to it using the more primitive form of 3D graphics generation which used integer coordinate models instead of the floating point accurate models, but that's outside the scope of this page. Here's a cool article about it.
Some emulators in Batocera have the Precision Geometry Transform Pipeline (PGXP) which can attempt to correct this; it's still fairly unstable though and can cause games to unexpectedly crash, so use with caution. The only way to activate this is through duckstation-emu-config (F1 on systems menu, Applications) under Settings > Enhancement Settings > PGXP > Geometry Correction or through RetroArch's Quick Menu for the mednafen and swanstation cores (Hotkey+![]() ) (correct as of v31). PGXP corrects physical geometry, PGXP Perspective Correct Texturing corrects the textures on geometry. The benefits of this are best seen in motion: https://www.youtube.com/watch?v=EYCpd_1lPUc
) (correct as of v31). PGXP corrects physical geometry, PGXP Perspective Correct Texturing corrects the textures on geometry. The benefits of this are best seen in motion: https://www.youtube.com/watch?v=EYCpd_1lPUc
Here is a comparison of the perspective texture correction:
- Without PGXP texture correction:

- With PGXP texture correction:


Shamelessly stolen from the libretro docs.
Using texture correction requires PGXP to already be activated.
Dreamcast Render to Texture Enhancement
This setting has been removed from Flycast since v36! It's now automatically adjusted with rendering resolution.
The Dreamcast's screen buffer is infrequently utilized by games to produce certain graphics in-game, typically during the pause screen. By default, this buffer will be at native resolution, irrespective of the current rendering resolution.
| 3D Enhancement | Preview (click to enlarge) | Notes |
|---|---|---|
| Native rendering resolution |  | As the Dreamcast would have rendered it originally. |
| Increased rendering resolution |  | The most neutral enhancement. Notice how the edges of the taxi has become less jagged. |
| Increased resolution, native render to texture resolution |  | Despite the video output being higher resolution, the screen buffer is still at a low native resolution. |
| Increased resolution, 4x render to texture resolution | 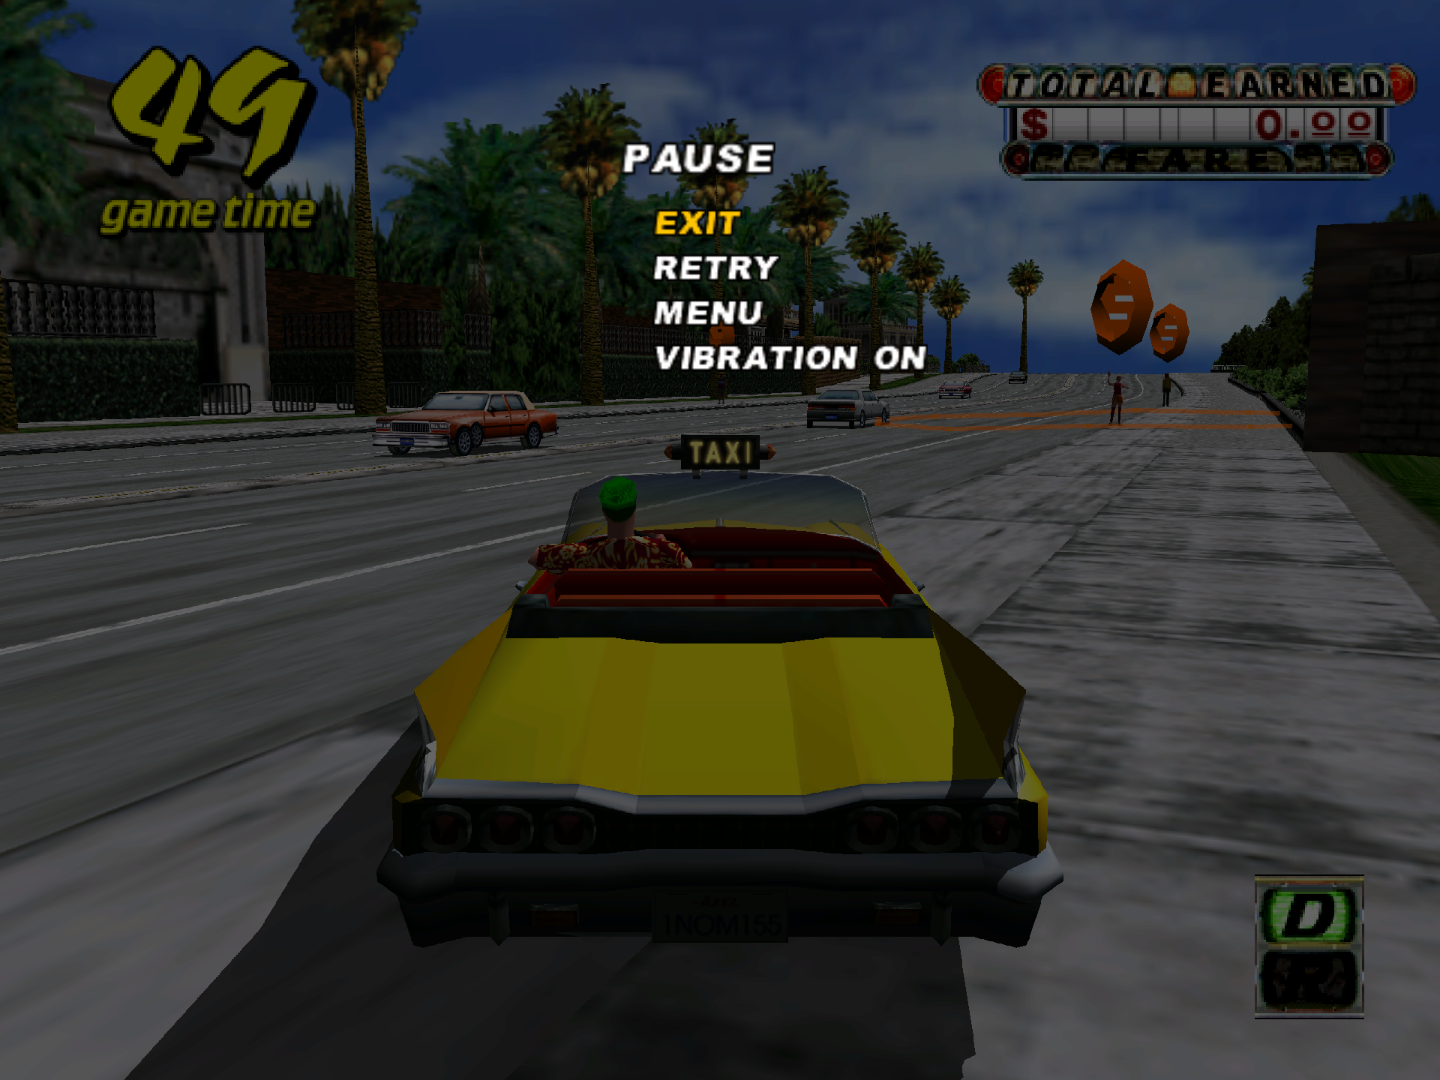 | Now both the rendering resolution and the screen buffer are higher resolution, resulting in a clearer pause screen in Crazy Taxi. |
- anti-aliasing.txt
- Last modified: 15 months ago
- by atari